Read the instructions while the car still starts
A portable jump starter is easier to understand at home than beside a car that will not start. Before you need it, read both the pack’s instructions and your exact vehicle’s jump-start section, then check that the equipment is actually compatible.
This is a preparation guide, not a universal clamp-connection sequence. Battery chemistry, voltage, approved connection points, vehicle design, and the device’s instructions determine the procedure, so you should not build a roadside routine from a photograph of somebody else’s car.
If you cannot identify those details confidently, arrange professional help instead of experimenting. A compact tool can store substantial energy, and a familiar red-and-black cable arrangement does not make every battery or connection appropriate.
Your first purchase decision is therefore whether you can support the tool with the right information and upkeep. Buying a larger advertised amp number cannot replace a clear understanding of what the device is designed to do.
Set aside time to read the safety section as well as the quick-start page. That gives you a chance to ask the manufacturer or a qualified service provider about anything unclear before you are under pressure.
Confirm the battery and vehicle match
Start with the vehicle’s actual low-voltage battery information and approved jump-start instructions. Do not infer the battery chemistry from the vehicle’s badge or assume that an accessible metal point is an approved connection location.
As one concrete example, the NOCO GB40 user guide specifies jump starting 12-volt lead-acid batteries only. It also tells you to consult the vehicle’s instructions and not attempt a damaged or frozen battery; those are compatibility boundaries, not minor footnotes.
That example is not approval for every vehicle with a nominal 12-volt system. Your car’s manual and the exact device instructions must agree on the application and method before the equipment belongs in your plan.
Keep high-voltage hybrid and electric-vehicle components outside this process. If your vehicle has a separate approved low-voltage jump procedure, identify it from the correct manual rather than following a general engine-bay illustration.
Write the exact vehicle and device models on your saved notes. If you replace the car or lend the pack to another driver, revisit the match instead of transferring your previous instructions automatically.

Locate the approved points without connecting anything
While the car is safely parked and switched off, use your manual to locate the specified access points. This is an identification exercise; you do not need to perform a practice jump start to discover where information is missing.
Some vehicles use designated remote points rather than requiring direct access to the battery. Follow the exact documentation, and do not remove unfamiliar covers or route cables through an engine bay just because an online photo looks similar.
Take your own reference notes only where you can do so safely. Label them with the model year and the manual section, and avoid turning a close-up photo into instructions that another driver might apply to a different car.
Look at the available working space and whether you could keep the pack and leads clear of hazards as required. If the supplied leads cannot reach the approved locations in the specified way, ask about compatible equipment rather than improvising extensions.
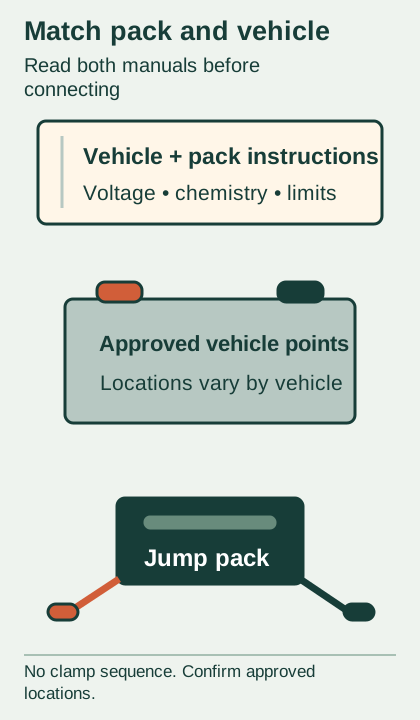
The diagram below separates the vehicle’s approved points from the portable pack. It deliberately avoids giving a clamp order or representing your actual engine bay, because those details need the matching instructions.
Make charging and storage part of ownership
Find the charging instructions for the exact version you have. A model family can change over time, so use the connectors, ratings, and supplied documentation of your actual unit rather than a review of an older package.
Make sure you have the appropriate cable and charging source before you put the pack away. A cable that physically fits does not prove that the whole charging setup meets the device’s instructions or delivers a claimed fast-charge rate.
Read the storage temperature limits and choose a location accordingly. If the car’s storage environment cannot stay within the specified limits, you need a different storage plan rather than assuming that an emergency product tolerates every parked-car temperature.
Set a reminder to check charge and condition according to the manufacturer’s guidance. You want to discover a depleted pack, damaged case, or missing cable during a calm review instead of when the vehicle has already failed to start.
Keep the protective storage arrangement and instructions together. If you move the pack between vehicles, include that move in your routine so the tool does not end up fully charged in the wrong trunk.
Learn what the indicators mean
Read the meaning of charge, error, temperature, and connection indicators in your own device’s guide. Different lights can represent different conditions, and a bright display is not proof that the tool is ready to start your vehicle.
The GB40 guide, for example, distinguishes the pack’s internal charge indication from its boost and error states. You should look up the actual signal you see rather than repeatedly pressing buttons until the pattern changes.
Pay special attention to any manual override feature. The cited guide warns that override disables important protections, so you should not treat it as an ordinary next step when automatic operation does not proceed.
If the meaning is unclear, stop and seek the appropriate help. You do not have to prove that the pack works by forcing an output, and an unsuccessful attempt does not establish that you simply need a more powerful model.
Save the support information where you can find it without a working vehicle. Having the guide offline can help you describe an indicator accurately, even when the best decision is to leave the equipment unused.
Prepare the people who share the car
Show another regular driver where the pack and instructions live. Explain the compatibility limits and the point where they should call for help, rather than giving them a memorized clamp routine detached from the manual.
If somebody is uncomfortable around vehicle batteries, respect that boundary. Roadside assistance can be part of a good emergency plan even when you carry a jump starter, and nobody has to use unfamiliar equipment under pressure.
Agree that the location comes first if the car fails to start. An exposed shoulder, unsafe weather, or another immediate hazard can make a technically compatible tool the wrong practical choice for that moment.
Keep passengers and distractions away from any permitted procedure. Follow the relevant safety instructions and do not ask someone to film a demonstration while you are trying to interpret warning lights or cable routing.
If you lend the pack, send the actual guide and model information with it. Your successful preparation for one vehicle does not establish compatibility with a friend’s car or remove their need to understand the instructions.
Plan what happens after the engine starts
A successful start answers a narrow question about that moment; it does not diagnose why the car would not start. Arrange the appropriate inspection when needed instead of treating the pack as a permanent substitute for fixing a recurring problem.
Write down the symptoms you noticed before and after the event. You can tell a shop whether the vehicle cranked slowly, showed a message, or failed again later without claiming that the battery or alternator has already been proven faulty.
After use, follow the device’s instructions for disconnecting, inspecting, recharging, and storing it. Replace missing information or damaged accessories before the next trip so the emergency setup returns to a known condition.
Your useful preparation ends with a compatible tool, the correct instructions, a workable storage plan, and a clear limit on what you will attempt. That is a more dependable basis for a roadside decision than confidence built from a generic demonstration video.
Sources & scope
Checked October 15, 2026. Manufacturer examples apply to the named model and document. Reader scenarios and organization are original editorial explanations.
- NOCO GB40 user guide, 2022 revision — 12V lead-acid compatibility, damaged/frozen battery limits, indicators, manual override protection limits; charging connector facts from this older guide not applied to current package.